Booking Research Rooms: Difference between revisions
(Created page with 'Go to https://connect.sfu.ca/ and log in with your SFU credentials, as you normally would. Select the Calendar tab; you should see the Quick Add popup, like this: <br> [[Image:…') |
No edit summary |
||
| Line 1: | Line 1: | ||
Go to https://connect.sfu.ca/ and log in with your SFU credentials, as you normally would. Select the Calendar tab; you should see the Quick Add popup, like this: | Go to https://connect.sfu.ca/ and log in with your SFU credentials, as you normally would. Select the Calendar tab, right click on the day for the booking and click 'New Appointment'; you should see the Quick Add popup, like this: | ||
<br> | <br> | ||
| Line 17: | Line 17: | ||
<br> | <br> | ||
Click on the Appointment Details tab, you should see something similar to the screenshot below - notice that the Location has now been filled in, and a Resources entry | |||
appears under the Attendees box. | appears under the Attendees box. | ||
Revision as of 20:48, 25 March 2011
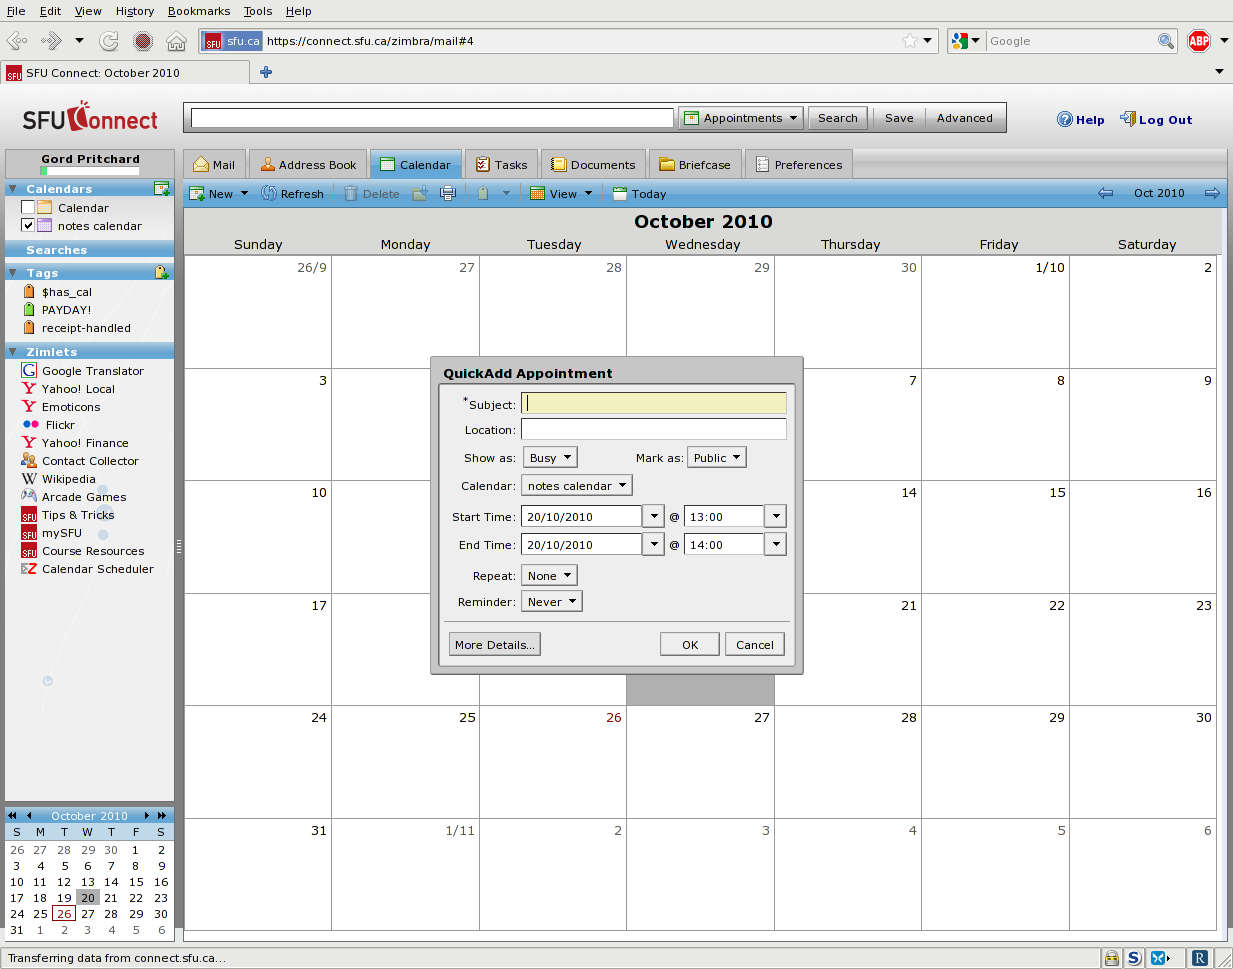
Go to https://connect.sfu.ca/ and log in with your SFU credentials, as you normally would. Select the Calendar tab, right click on the day for the booking and click 'New Appointment'; you should see the Quick Add popup, like this:
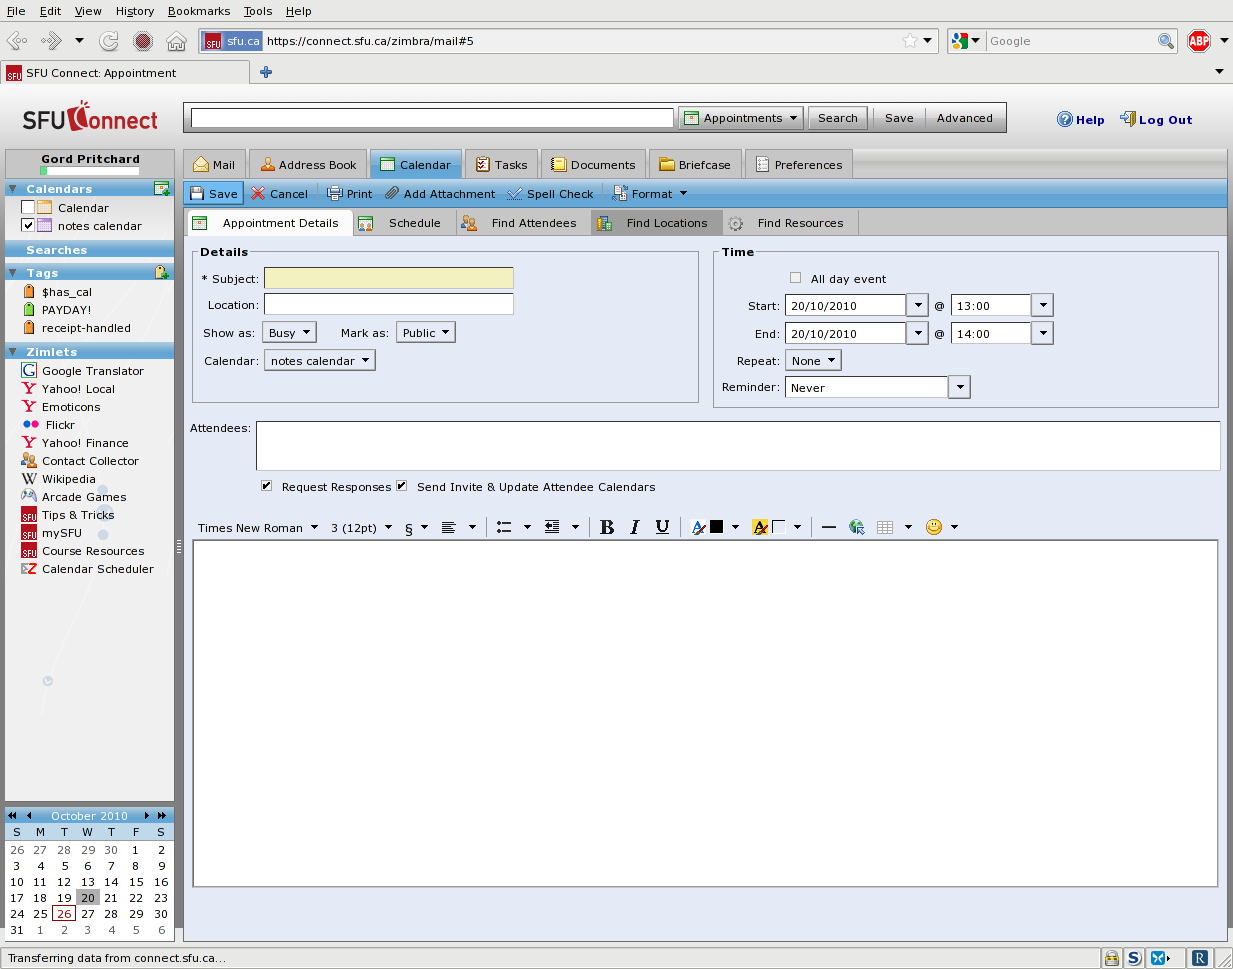
Click on the More Details (lower left). You should now see the expanded Appointment Details screen:
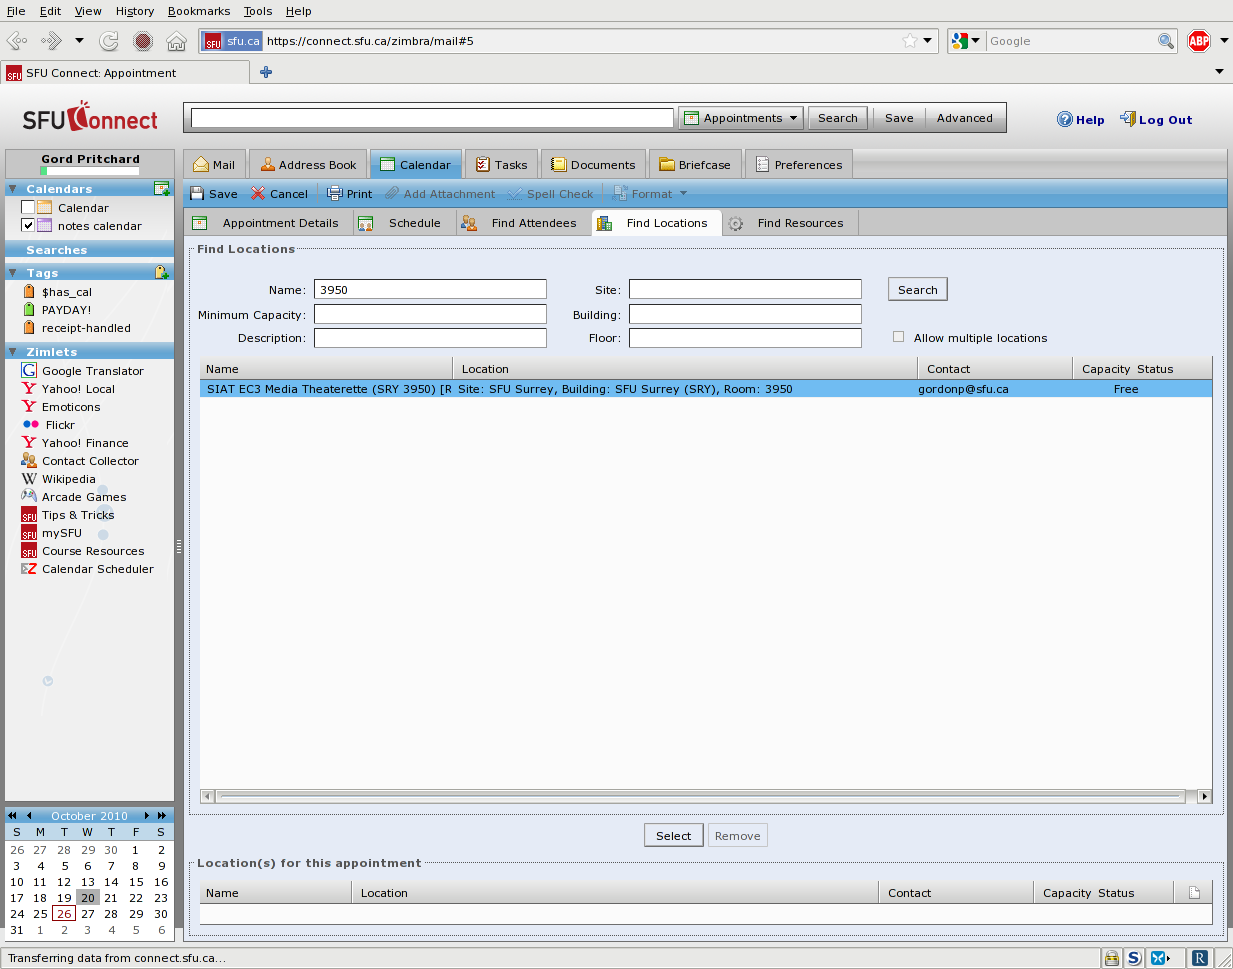
Click on Find Locations (upper middle tab). Now, you should be looking at something like the screen shot below; for Name, provide a room (I have used the room-number 3950), and click Search. The system will suggest matches; if more than one result is found, highlight the one you want and click Select at the bottom middle:
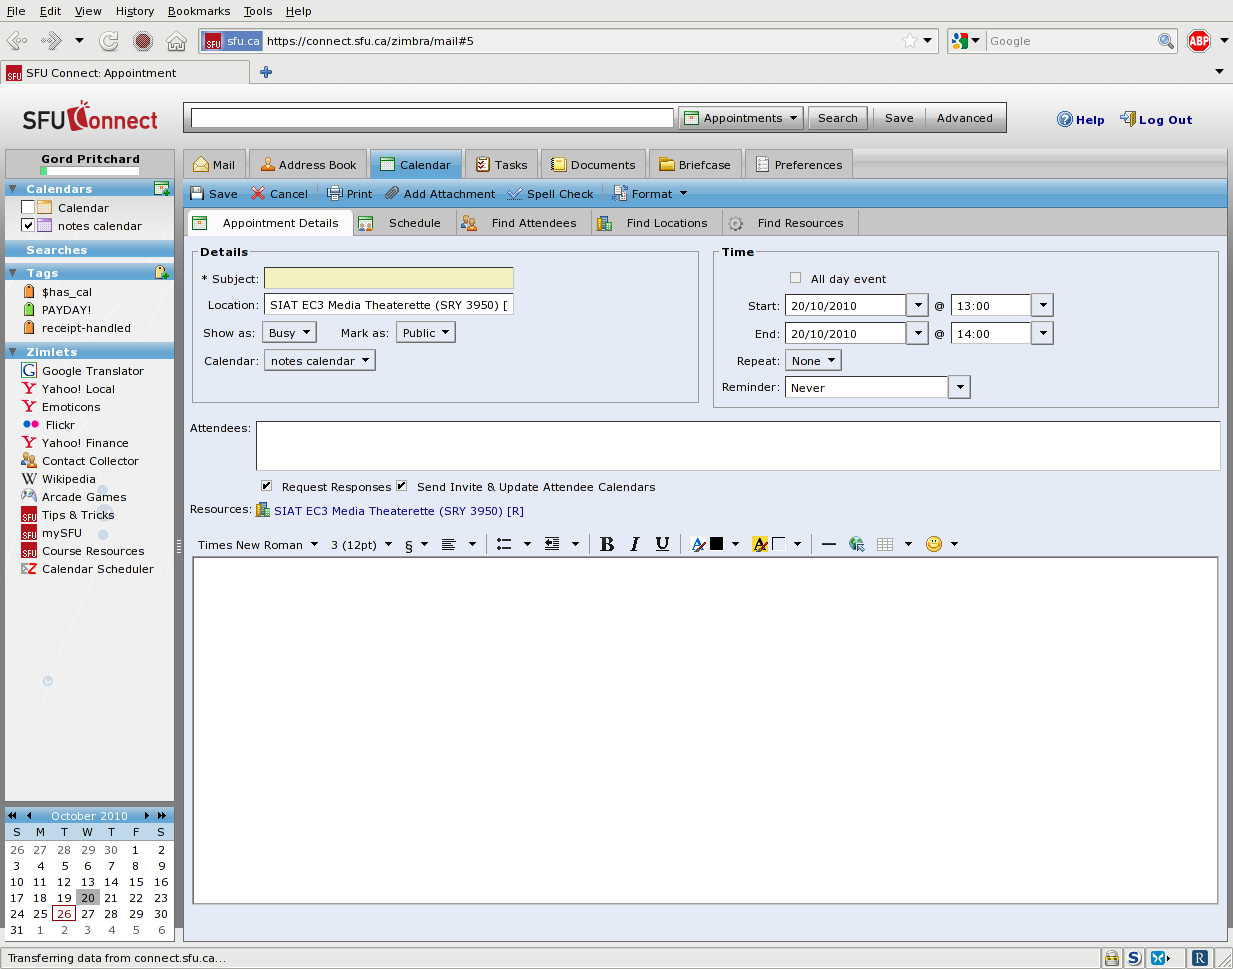
Click on the Appointment Details tab, you should see something similar to the screenshot below - notice that the Location has now been filled in, and a Resources entry
appears under the Attendees box.
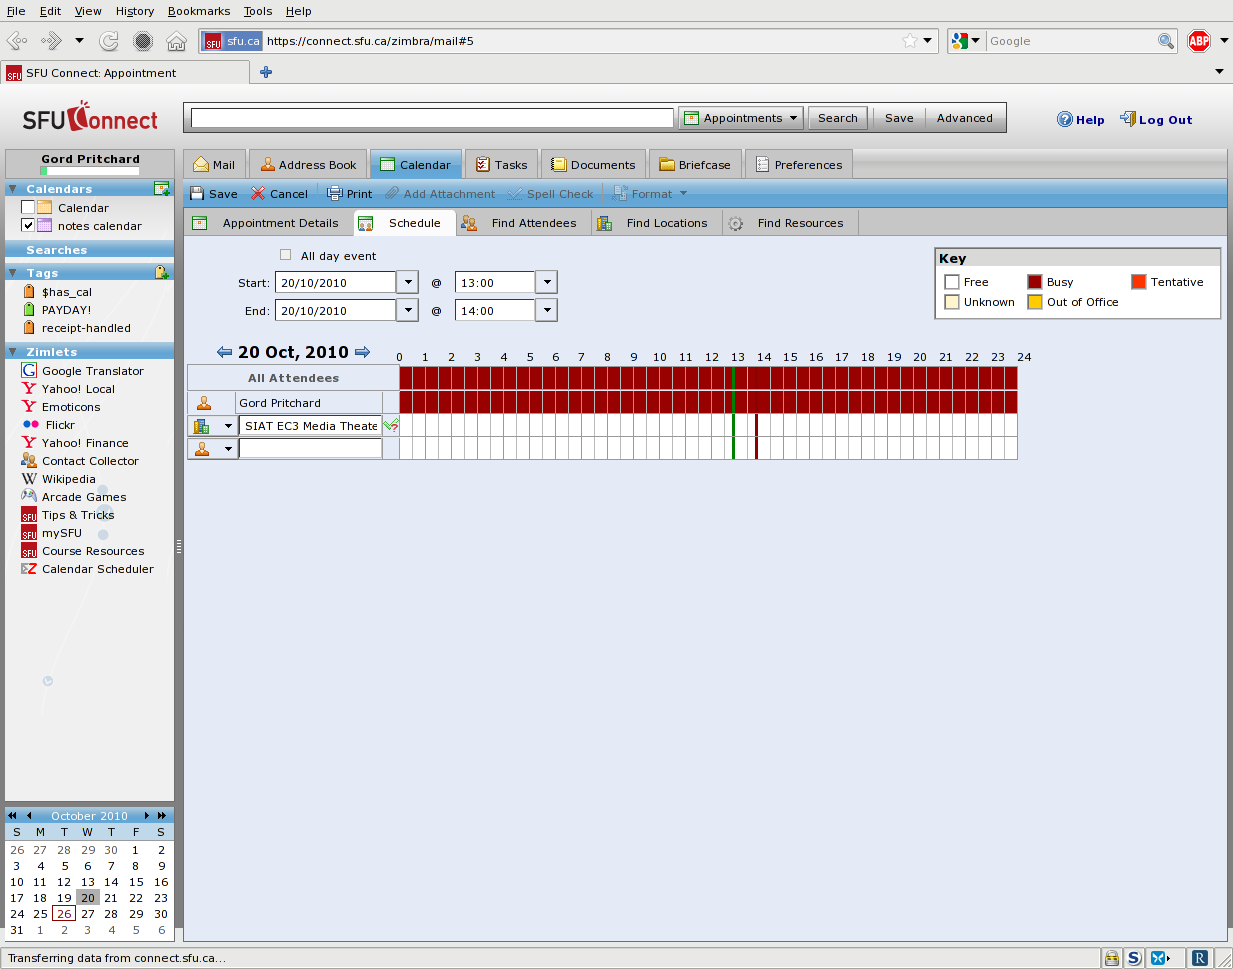
If you want to check the availability of a room or Attendees, after you have made the Location and Attendee selections, click on Schedule tab:
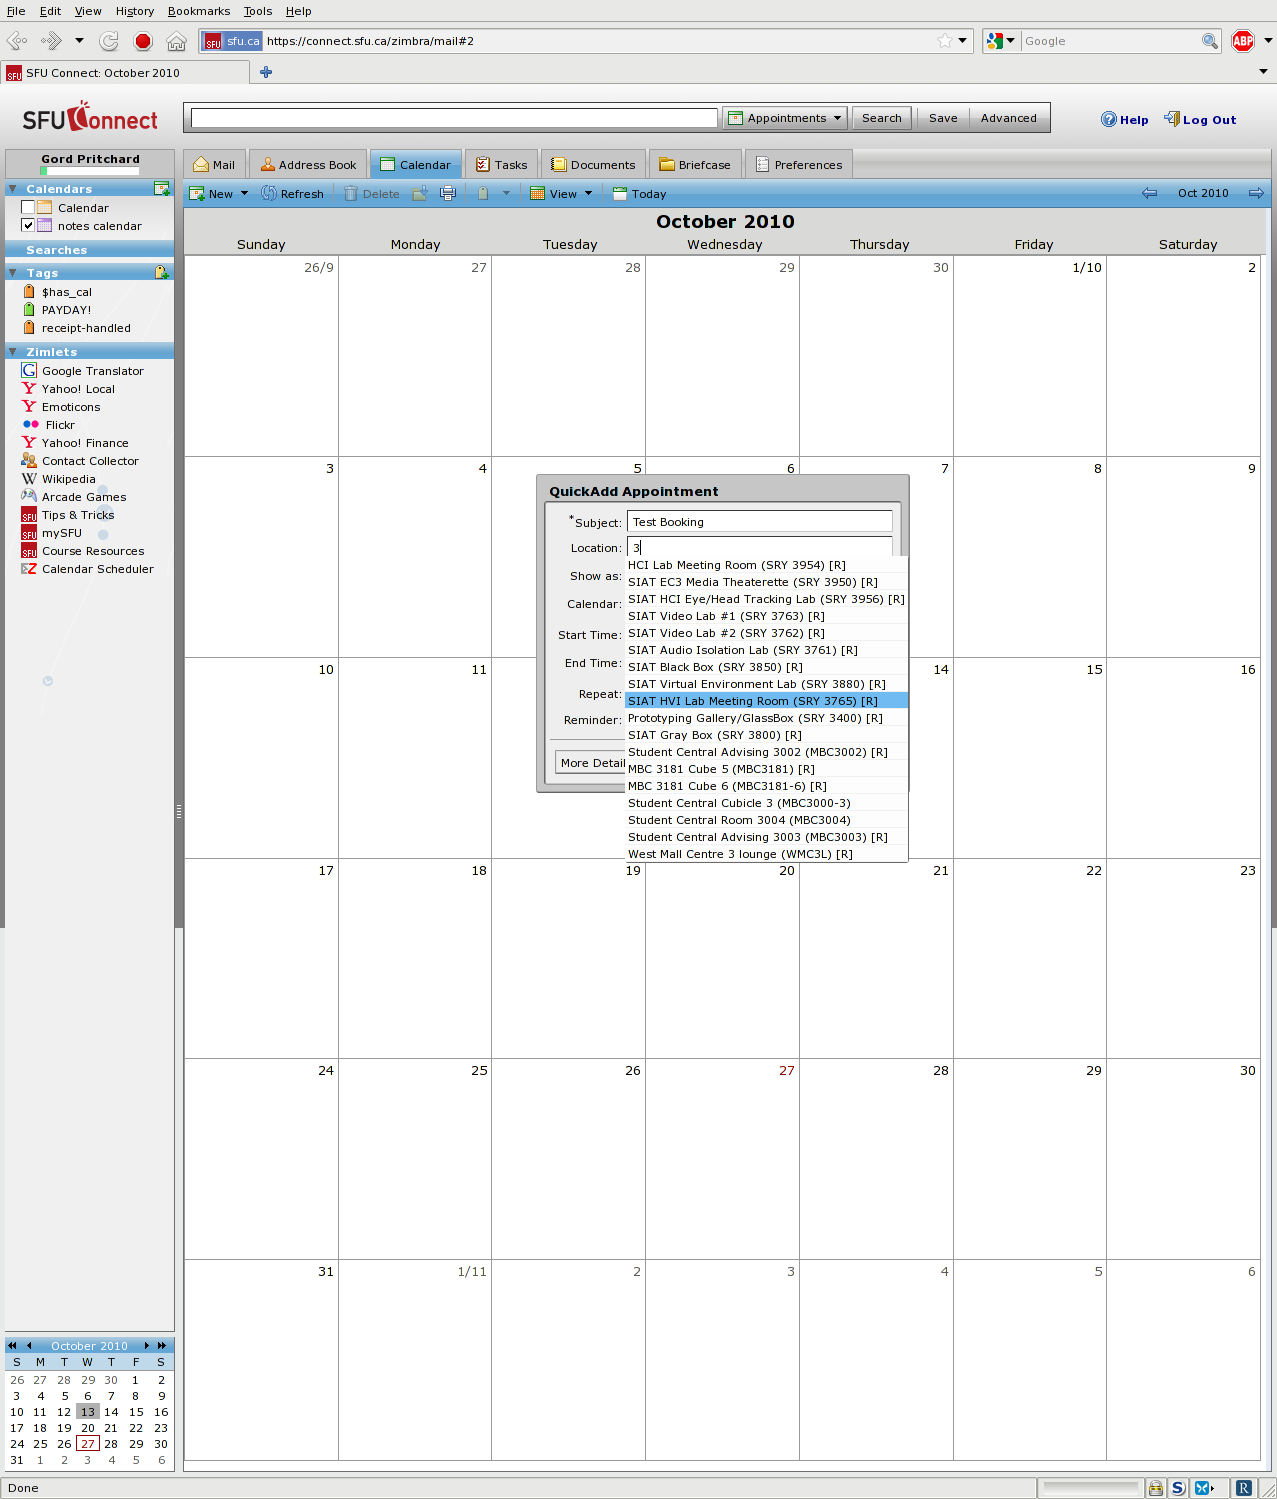
Late-breaking news: you can now use AutoComplete for the room name/number, right from the Quick Add screen; enter any portion of the room name or number, and a drop-down selection will appear, allowing you to choose the exact item you want:
